
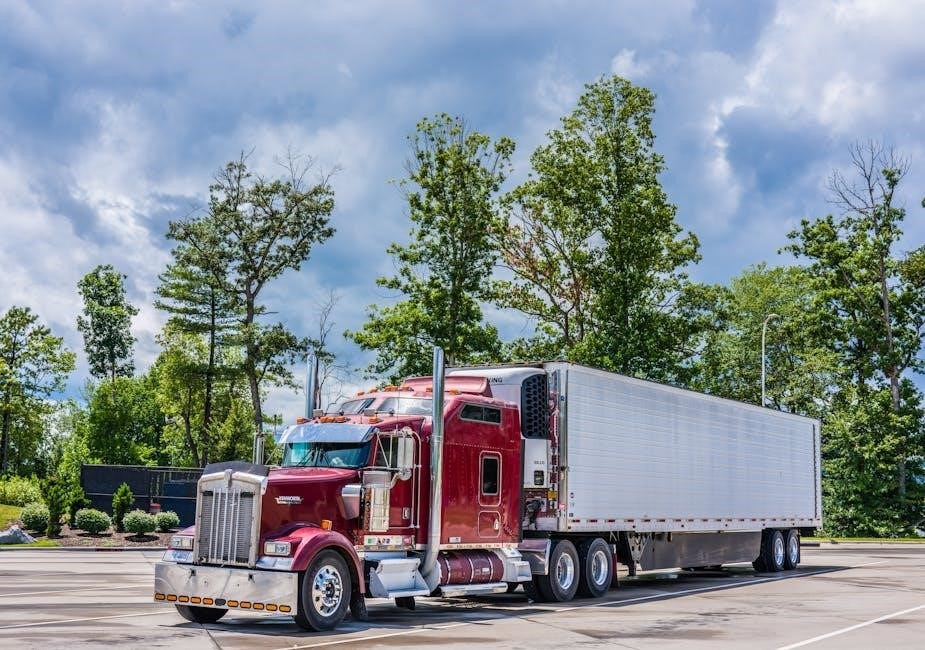
Manually lowering a dump trailer requires careful preparation and understanding of its mechanisms․ This process ensures safety and control when hydraulic systems fail․ Learn key steps and precautions to execute it effectively․
Why Manual Lowering is Necessary
Manual lowering is essential when hydraulic or pneumatic systems fail, ensuring safe trailer operation․ It provides control during emergencies, preventing sudden drops and potential accidents․ This method is also crucial in remote locations with limited access to power or professional assistance․ Regular use of manual lowering keeps operators prepared for unexpected malfunctions, ensuring efficiency and safety in various working conditions․ Understanding this process is vital for maintaining control and preventing damage to equipment or surroundings․
Key Safety Considerations
Always wear personal protective equipment, including gloves and safety glasses, to protect against falling debris․ Ensure the trailer is on level ground and secured with blocks and chocks to prevent movement․ Never attempt manual lowering without proper training or assistance․ Be aware of your surroundings and keep bystanders at a safe distance․ Regularly inspect the trailer’s mechanisms to identify potential hazards․ Follow established procedures precisely to avoid accidents and ensure a controlled descent․ Safety should never be compromised during this process․

Understanding the Dump Trailer Mechanism
A dump trailer relies on a hydraulic system and emergency release mechanisms to lower loads․ Key components include hoists, lift arms, and locking pins, ensuring controlled operation․
Hydraulic System Overview
The hydraulic system powers the dump trailer’s lifting and lowering functions․ It consists of a pump, reservoir, and valves, relying on pressurized fluid to operate․ The system enables precise control over the trailer’s movement, ensuring safe and efficient load management․ Hydraulic fluid pressure is crucial for lifting heavy loads, while valves regulate fluid flow․ Understanding this system is vital for manual operations, as it allows operators to release pressure safely and lower the trailer without relying on automation․ Regular maintenance of hydraulic components ensures optimal performance and prevents potential failures during operation․
Hoist and Lift Components
The hoist and lift components are essential for controlling the dump trailer’s movement․ These include hydraulic cylinders, lift arms, and stabilizing gears․ The hoist system connects to the trailer’s frame, enabling vertical movement․ Lift components, such as hydraulic rams, provide the force needed to raise and lower the trailer bed․ These parts work in tandem to ensure smooth operation․ In manual lowering, understanding how these components interact is crucial for maintaining control and preventing sudden drops․ Regular inspection of these elements is vital to ensure safe and efficient operation․
Emergency Release Mechanisms
Emergency release mechanisms are critical for safely lowering a dump trailer when primary systems fail․ These mechanisms, often lever- or valve-activated, bypass hydraulic locks to allow immediate control․ They prevent accidents by enabling quick release of stored energy․ Regular inspection ensures reliability, while proper activation techniques avoid sudden, uncontrolled drops․ Understanding these mechanisms is vital for maintaining trailer stability during emergencies․ Always test them periodically to confirm functionality and ensure they can be engaged effortlessly in critical situations․

Safety Precautions Before Lowering
Always ensure safety measures are in place before manually lowering the trailer․ Inspect the trailer’s condition, wear appropriate PPE, and secure the surrounding area to prevent accidents and ensure a controlled descent․
Personal Protective Equipment (PPE)
Always wear appropriate PPE when manually lowering a dump trailer to protect yourself from potential hazards․ Essential items include steel-toe boots, heavy-duty gloves, safety glasses, and high-visibility clothing․ A hard hat is also recommended to safeguard against falling debris․ Ensure all PPE is in good condition and properly fitted․ Additionally, consider using ear protection if operating loud equipment․ Wearing PPE minimizes risks and ensures a safer working environment․ Always follow manufacturer guidelines for equipment usage and maintenance․ Safety should never be compromised․
Assessing the Trailer’s Condition
Before manually lowering a dump trailer, thoroughly inspect its condition to ensure safety․ Check the hydraulic lines and fittings for any damage or leaks․ Inspect the tires for proper inflation and wear․ Examine the dump gate and hoist mechanism for smooth operation․ Look for signs of wear or damage on the frame and structural components․ Verify that the load is evenly distributed to prevent instability․ Address any issues before proceeding to avoid accidents․ Always consult the manufacturer’s guidelines for specific inspection points and procedures․
Ensuring a Safe Environment
Ensuring a safe environment is critical before manually lowering a dump trailer․ Clear the area of bystanders and obstacles․ Position the trailer on level, firm ground to prevent tipping․ Ensure proper lighting for visibility․ Remove any potential hazards that could interfere with the process․ Check for overhead obstructions and tripping hazards․ Use stabilizing bars and chocks as needed to secure the trailer’s position․ These precautions minimize risks and ensure a controlled lowering operation․
Preparing the Trailer for Manual Lowering
Position the trailer on level ground and secure it with blocks and chocks for stability․ Disconnect hydraulic or pneumatic lines carefully, following the manufacturer’s instructions․ Ensure the area is clear of obstacles and bystanders for safety․
Positioning the Trailer on Level Ground
Positioning the trailer on level ground is crucial for stability during manual lowering․ Use a spirit level to ensure the surface is even․ If the ground is uneven, place wooden planks or metal shims under the tires to create a stable base․ Ensure the trailer’s parking brake is engaged and wheel chocks are securely in place․ This step prevents the trailer from rolling or shifting, ensuring a controlled and safe lowering process․ Always refer to the manufacturer’s guidelines for specific leveling requirements․
Securing the Trailer with Blocks and Chocks
Securing the trailer with blocks and chocks is essential for safety․ Place heavy-duty wheel chocks on both sides of the rear wheels to prevent rolling․ Position wooden or metal blocks under the trailer’s frame near the front and rear axles for added stability․ Ensure all blocks and chocks are tightly fitted and capable of supporting the trailer’s weight․ This step ensures the trailer remains stationary during manual lowering, reducing the risk of accidents or damage․ Always double-check the security of the setup before proceeding․
Disconnecting Hydraulic or Pneumatic Lines
Disconnecting hydraulic or pneumatic lines is a critical step before manual lowering․ Locate the quick-release couplers on the hydraulic lines and detach them slowly to avoid sudden pressure release․ Use a wrench or socket to loosen any fittings securely․ After disconnection, cap the lines to prevent contamination․ Ensure all pressure is released from the system by activating the emergency release valve․ This prevents unexpected movement and ensures a controlled lowering process․ Always refer to the manufacturer’s guidelines for specific disconnection procedures․

Step-by-Step Manual Lowering Process
Manually lowering a dump trailer involves releasing hydraulic pressure, using manual cranks, and controlling descent with winches․ Ensure safety by securing the trailer and monitoring its movement closely․
Locating and Operating the Manual Release Valve
The manual release valve is typically found near the hydraulic pump or cylinder․ To operate, turn the valve counterclockwise to release pressure․ Ensure the trailer is secured with blocks and chocks before proceeding․ This step is crucial to safely lower the trailer without sudden drops․ Always refer to the manufacturer’s manual for specific locations and instructions, as designs may vary․ Proper operation prevents accidents and maintains control during the lowering process․
Using a Manual Crank or Handle
The manual crank or handle is used to lower the dump trailer when hydraulic systems fail․ Locate it near the hoist or lift mechanism․ Attach the crank securely and turn it clockwise to engage the manual override․ Slow, consistent turns will lower the trailer gradually․ Always wear PPE and ensure the trailer is stabilized with jack stands or blocks․ If resistance is felt, stop and inspect for obstructions․ This method ensures controlled descent and prevents sudden drops, maintaining safety throughout the process․
Controlling the Descent with Winches or Pulleys
Winches or pulleys can assist in manually lowering a dump trailer, providing additional control․ Attach the winch to a sturdy anchor point and connect it to the trailer’s lifting mechanism․ Use high-strength cables or ropes to ensure stability․ Slowly operate the winch, maintaining even tension to guide the trailer’s descent․ This method helps prevent sudden drops and ensures a controlled lowering process․ Always inspect the winch and cables for damage before use and consider having a second person assist for added safety․
Monitoring the Trailer’s Movement
Constantly monitor the trailer’s movement during manual lowering to ensure a controlled descent․ Assign a spotter to observe from a safe distance and provide feedback․ Watch for any signs of uneven movement or deviation from the intended path․ Use visual aids like spirit levels to maintain balance and prevent tipping․ Listen for unusual sounds that may indicate mechanical stress or failure․ Pause the process if any instability is detected, and make necessary adjustments to ensure a safe, steady lowering of the trailer․

Handling Hydraulic or Pneumatic Systems
Understanding hydraulic or pneumatic systems is crucial for safe manual lowering․ Always release pressure manually and engage overrides to maintain control and ensure a smooth operation․
Understanding Hydraulic Pressure Release
Releasing hydraulic pressure is essential before manually lowering a dump trailer․ This involves locating the pressure release valve and slowly opening it to allow fluid to drain safely․ Always wear PPE and ensure the system is depressurized to prevent sudden movement․ Improper release can lead to accidents or equipment damage․ Follow manufacturer guidelines for specific procedures, and never bypass safety measures․ Proper pressure release ensures a controlled and secure lowering process, minimizing risks to personnel and machinery․ This step is critical for safe operation․
Draining Fluid from the Hydraulic System
Draining hydraulic fluid is a crucial step when manually lowering a dump trailer․ Locate the drain valve, usually at the lowest point of the system․ Place a drip pan underneath and slowly open the valve to allow fluid to flow out․ Be cautious of hot fluid and wear protective gloves․ Once drained, close the valve securely to prevent contamination․ Proper drainage ensures safe handling and prevents fluid spills during the lowering process․ Always dispose of hydraulic fluid responsibly according to local regulations and guidelines․
Engaging Manual Overrides
Engaging manual overrides is essential when the hydraulic system fails to lower the dump trailer automatically․ Locate the manual release valve, typically found near the hydraulic pump or cylinder․ Ensure the system is depressurized before proceeding․ Turn the valve clockwise to release pressure gradually․ Use a wrench or handle to operate the valve if necessary․ Always refer to the manufacturer’s guidelines for specific instructions․ Manual overrides provide a safe and reliable method to control the trailer’s descent when hydraulic functions are compromised․ Proceed with caution to avoid sudden movements or accidents․

Using Auxiliary Tools and Equipment
Auxiliary tools like jack stands, support beams, and hydraulic jacks are crucial for stabilizing the trailer during manual lowering, ensuring safety and preventing structural damage․
Importance of Jack Stands and Support Beams
Jack stands and support beams provide essential structural reinforcement during manual lowering, preventing trailer collapse․ They stabilize the frame, ensuring even weight distribution and safety․ Proper placement is critical to avoid accidents and maintain control over the trailer’s descent․ These tools are indispensable for securing heavy loads and protecting both the operator and equipment from potential damage․ Always use high-quality, load-rated stands to handle the trailer’s weight effectively․
Applying Wheel Chocks and Stabilizing Bars
Wheel chocks and stabilizing bars are crucial for preventing trailer movement during manual lowering․ Chocks wedge against tires to block rolling, while stabilizing bars reinforce the frame’s stability․ Proper placement ensures the trailer remains stationary, reducing risks of accidents․ These tools are especially vital on uneven surfaces, where movement could lead to dangerous shifts in weight distribution․ Always secure both front and rear wheels with durable chocks and cross-check stabilizing bars for maximum safety and control during the lowering process․
Utilizing Hydraulic Jacks or Floor Jacks
Hydraulic jacks or floor jacks provide the necessary lifting force to lower a dump trailer manually․ These tools allow controlled descent by distributing weight evenly․ Always position the jack under the trailer’s reinforced frame points to avoid damage․ Ensure the jack’s capacity matches the trailer’s weight for safe operation․ Use jack stands as additional support to maintain stability and prevent sudden drops․ Regular inspection of the jack’s hydraulics and structural integrity is essential to ensure reliability during the lowering process․

Post-Lowering Procedures
After lowering, secure the trailer, reconnect hydraulic lines, and inspect for damage or leaks to ensure safety and proper functionality․
Securing the Trailer in the Lowered Position
Once the trailer is fully lowered, use wheel chocks and stabilizing bars to prevent any movement․ Engage the parking brake and ensure all locking mechanisms are in place․ Additionally, place jack stands under the frame for added support and safety․ This step is crucial to maintain stability and prevent accidental shifts, especially when the trailer is unattended or in storage․ Always double-check the security measures before leaving the trailer unattended․
Reconnecting Hydraulic or Pneumatic Lines
After lowering, reconnect hydraulic or pneumatic lines carefully to avoid leaks or damage․ Inspect lines for wear or damage before reattaching․ Use a torque wrench to ensure proper fitting and tighten connections gradually․ Test the system at low pressure to verify integrity․ If unsure, consult the manufacturer’s manual for specific instructions․ Proper reconnection is essential for restoring functionality and preventing future malfunctions;
Inspecting for Damage or Leaks
After manually lowering the dump trailer, inspect the hydraulic and pneumatic systems for any damage or leaks․ Check hydraulic lines, fittings, and cylinders for signs of wear or fluid seepage․ Use a torque wrench to ensure all connections are secure․ Test the system at low pressure to identify any potential leaks․ If fluid leaks are detected, use a UV dye kit to locate the source․ Always consult the manufacturer’s manual for specific inspection guidelines․ Addressing issues promptly prevents further damage and ensures safe operation․
Troubleshooting Common Issues
Identify and diagnose common problems during manual lowering, such as stuck components or hydraulic malfunctions․ Apply appropriate solutions to ensure safe and effective operation․
Dealing with Stuck or Jammed Components
When components like valves or hoists jam, assess the situation carefully; Apply penetrating oil or heat to loosen stuck parts․ Use wrenches or tools to gently manipulate components․ Avoid excessive force, which may cause damage․ If manual effort fails, consider professional assistance․ Always prioritize safety to prevent accidents during repairs․ Regular maintenance can help minimize such issues․
Addressing Hydraulic System Malfunctions
Hydraulic system malfunctions can hinder manual lowering․ Inspect for fluid leaks or pressure drops, which may indicate worn seals or blocked lines․ Use a manual override to release pressure if the system fails; Ensure the trailer is stabilized with jack stands before attempting repairs․ If the issue persists, consult a professional․ Always follow safety protocols to avoid accidents․ Regular maintenance, like checking hydraulic lines and fittings, can prevent such malfunctions․ Addressing these issues promptly ensures smooth operation and safety during the lowering process․
Managing Unexpected Movement or Instability
Unexpected movement or instability during manual lowering can be dangerous․ If the trailer shifts or tilts, stop the process immediately․ Use jack stands or support beams to stabilize the trailer․ Ensure the load is evenly distributed to prevent further imbalance․ Inspect the securing points and tighten any loose connections․ If instability persists, consider consulting a professional․ Always prioritize safety by maintaining control and being prepared for sudden movements․ Regular inspections of the trailer’s structure can help prevent such issues during the lowering process․
Emergency Procedures
In case of sudden malfunctions or instability, stop the lowering process immediately․ Secure the trailer using jack stands and ensure everyone’s safety․ Evacuate the area if necessary and contact professional assistance to resolve the issue safely․
Responding to Sudden Drops or Malfunctions
If the trailer drops unexpectedly or a malfunction occurs, immediately stop all operations․ Engage emergency brakes and secure the trailer with jack stands or stabilizing bars․ Ensure everyone in the vicinity is safe and away from the trailer․ If the situation is uncontrollable, evacuate the area and contact professional assistance․ Prioritize safety and avoid attempting repairs without proper expertise․ Always have a plan in place for such emergencies to minimize risks and prevent accidents․
Evacuating the Area if Necessary
If a sudden drop or malfunction poses immediate danger, evacuate the area promptly․ Ensure all personnel are at a safe distance from the trailer․ Do not attempt to intervene without proper safety measures․ Clear the surrounding zone to prevent injuries or damage․ Once everyone is safe, assess the situation from a distance․ Contact emergency services or professional help if necessary․ Safety of people and property must always be the top priority during such incidents․
Contacting Professional Assistance
If manual lowering becomes too risky or complex, seek professional help․ Contact a certified mechanic or heavy equipment specialist․ Provide detailed information about the issue, including the trailer model and hydraulic system specifics․ They will assess the situation and perform the necessary repairs safely․ Professional assistance ensures the job is done correctly, minimizing potential dangers․ Always prioritize expert intervention when unsure or unsafe to proceed independently․
Best Practices for Regular Maintenance
Regular maintenance is crucial for ensuring the dump trailer’s optimal performance․ Schedule periodic inspections of hydraulic lines and lubricate moving parts to prevent wear and tear․
Inspecting Hydraulic Lines and Fittings
Regular inspection of hydraulic lines and fittings is vital to ensure system integrity․ Look for signs of wear, leaks, or corrosion․ Check connections for tightness and damage․ Use pressure test kits to verify line strength․ Replace any compromised components immediately to prevent failures during operation․ Schedule professional inspections annually to maintain optimal performance and safety․ This proactive approach helps avoid costly repairs and downtime, ensuring reliable functionality when manually lowering the dump trailer․
Lubricating Moving Parts
Regular lubrication of moving parts is essential for smooth operation․ Apply high-quality grease to hinges, pivot points, and locks every 3 to 6 months or after exposure to harsh conditions․ This prevents corrosion and reduces friction, ensuring components move freely․ Wipe away old grease and dirt before applying new lubricant․ Proper lubrication extends equipment life and prevents mechanical failure during manual lowering․ Neglecting this step can lead to increased wear and potential breakdowns, emphasizing its importance in routine maintenance․
Scheduling Professional Servicing
Regular professional servicing ensures optimal performance and safety․ Schedule inspections every 6 to 12 months or after heavy use․ Mechanics check hydraulic systems, brakes, and structural integrity․ They address wear and tear early, preventing costly repairs․ For complex issues like hydraulic leaks or electrical malfunctions, professional expertise is crucial․ Maintain a service log to track maintenance history, ensuring compliance with safety standards․ This proactive approach minimizes downtime and enhances reliability, making it a critical part of trailer maintenance․
Manually lowering a dump trailer requires precision, safety, and adherence to guidelines․ Always prioritize proper techniques and professional maintenance to ensure smooth operations and prevent potential hazards․
To manually lower a dump trailer, start by ensuring safety and preparing the equipment․ Locate and operate the manual release valve, then use a crank or handle to control the descent․ Utilize winches or pulleys if needed for added control․ Monitor the trailer’s movement closely to prevent sudden drops․ Once lowered, secure the trailer with blocks and chocks, and inspect for any damage or leaks․ Always wear proper PPE and follow hydraulic system guidelines to ensure a safe and efficient process․
Final Safety Reminders
Always prioritize safety when manually lowering a dump trailer․ Wear proper PPE, ensure the trailer is stable, and monitor its movement closely․ Never overload the trailer beyond its capacity, and avoid sudden or uncontrolled descents․ Keep bystanders at a safe distance and be prepared for emergencies․ If unsure about any step, consult a professional․ Regular maintenance and inspections are crucial to prevent malfunctions․ Stay alert and follow all guidelines to ensure a safe and successful operation․