
Chicco KeyFit 30 Instruction Manual: A Comprehensive Guide
Navigating Barcelona’s Noguera Pallaresa street reveals property listings, maps, and local services; however, this guide focuses solely on the KeyFit 30’s safe operation.
Welcome to the Chicco KeyFit 30 Infant Car Seat instruction manual! This guide provides essential information for the safe and correct installation and use of your KeyFit 30, ensuring your little one travels securely. While Barcelona’s Noguera Pallaresa street offers a variety of local amenities and property options, our focus remains entirely on infant safety within this car seat.
The KeyFit 30 is designed for infants weighing 4-30 pounds and measuring up to 30 inches. It’s a rear-facing only car seat, meaning it must always be installed facing the back of the vehicle. Understanding the features and proper installation procedures detailed within this manual is crucial. Prior to first use, carefully review all instructions and familiarize yourself with the seat’s components. Remember, proper installation is paramount for optimal protection during every journey.
KeyFit 30: Safety Standards and Certifications
The Chicco KeyFit 30 car seat is engineered to meet or exceed stringent safety standards, providing parents with peace of mind. While Barcelona’s Carrer de la Noguera Pallaresa focuses on local living, this seat prioritizes your child’s well-being. It is certified to meet or exceed U.S. Federal Motor Vehicle Safety Standard 213.
This certification confirms the KeyFit 30 has undergone rigorous crash testing to ensure optimal protection in various impact scenarios. Furthermore, the KeyFit 30 boasts a Steel-Strength Frame, offering superior structural integrity. Chicco continuously invests in research and development to enhance safety features. Always refer to the official Chicco website for the most up-to-date information regarding certifications and safety testing. Proper use, as outlined in this manual, is vital to maintaining this high level of protection.

Installation & Use
Despite Barcelona addresses like Noguera Pallaresa being geographically specific, proper KeyFit 30 installation—using LATCH or seat belt—and correct infant positioning are crucial for safety.
Base Installation: LATCH System
Utilizing the LATCH (Lower Anchors and Tethers for Children) system offers a secure installation method for your Chicco KeyFit 30 base. Begin by locating the lower anchor connectors on your vehicle’s seat. These are typically found in the seat bight, where the seat back and cushion meet. Attach the LATCH connectors on the base to these anchor points, ensuring a firm connection.
Once connected, firmly tighten the LATCH straps until the base is securely installed and does not move more than one inch side-to-side or front-to-back. A properly installed base will feel solid and stable. Remember to consult your vehicle’s owner’s manual for specific LATCH weight limits and compatibility information. While Barcelona’s street layouts, like Noguera Pallaresa, offer defined routes, a secure car seat installation provides a defined path to safety for your child.
Always double-check the installation before each use.
Base Installation: Seat Belt Installation
If your vehicle does not allow for LATCH installation, or if your child’s weight exceeds LATCH limits, utilize the vehicle’s seat belt system for secure base installation. Route the vehicle’s seat belt through the designated belt path on the Chicco KeyFit 30 base, following the diagram printed on the base itself. Ensure the seat belt lies flat and is not twisted.
To tighten the seat belt, push down firmly on the base while simultaneously pulling the shoulder belt to remove any slack. Locking the seat belt is crucial; consult your vehicle’s owner’s manual for instructions on how to lock the seat belt in your specific vehicle. Similar to navigating Barcelona’s Carrer de la Noguera Pallaresa, a precise approach is key. The base should not move more than one inch in any direction.
Verify a snug fit before each journey.
Leveling the Base Indicator
Achieving the correct recline angle is paramount for infant safety, and the KeyFit 30 base features a built-in leveling indicator to assist with this. After installing the base – whether via LATCH or seat belt – locate the red indicator bubble on the side of the base. This bubble visually confirms proper installation.
The ideal position is within the marked green zone. If the bubble falls outside this zone, adjust the base’s recline angle using the recline adjustment foot located at the front of the base. Lowering the foot increases the recline, while raising it decreases it. Much like finding a suitable property on Barcelona’s Noguera Pallaresa, adjustments may be needed.
Re-check the indicator after each adjustment until the bubble resides firmly within the green zone.
Infant Positioning in the KeyFit 30
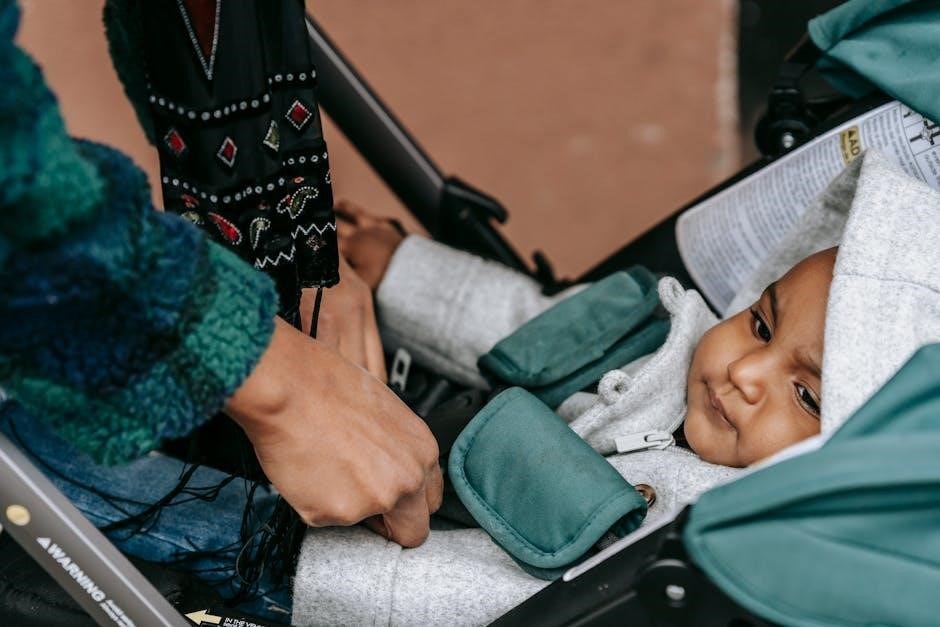
Proper infant positioning within the KeyFit 30 is crucial for both comfort and safety, mirroring the careful consideration given to locations like Noguera Pallaresa in Barcelona. Always place your baby on their back; this is the safest position for riding in a car seat. Ensure the baby’s head is fully supported by the headrest, and that the harness straps are at or below shoulder level.
Never place any bulky clothing or blankets under the harness straps, as these can compress in a crash, creating excessive slack. The infant insert should be used for smaller babies to provide a snug and secure fit. As your baby grows, remove the insert to ensure continued proper positioning.
Regularly check the fit as your baby develops.
Harness Adjustment: Shoulder Straps
Adjusting the shoulder straps correctly is paramount for a secure fit, much like finding the right location – such as a property on Noguera Pallaresa – requires careful consideration. The shoulder straps must originate at or below your baby’s shoulders when rear-facing. To adjust, locate the adjustment strap at the front of the carrier.
Pulling this strap will tighten the harness, while lifting the red release button simultaneously allows you to loosen it. Ensure both straps are adjusted to the same height, creating a balanced and snug fit. You should not be able to pinch any excess webbing at the shoulder. Regularly check the strap height as your baby grows, re-adjusting as needed to maintain proper positioning.
A properly fitted harness is essential for safety.
Harness Adjustment: Buckle and Crotch Strap
Securing the buckle and adjusting the crotch strap are crucial final steps, akin to confirming details of a Barcelona address like one on Noguera Pallaresa. After positioning the shoulder straps, fasten the buckle by inserting the buckle tongue fully into the buckle until you hear a distinct click. Ensure the buckle is securely latched before each use.
The crotch strap plays a vital role in preventing submarining. It should lie flat against your baby’s lap; To adjust, locate the adjustment strap where the crotch strap connects to the carrier. Tighten or loosen the strap to ensure a snug, but comfortable fit. You should only be able to fit one finger between the strap and your baby’s leg.
Always double-check both the buckle and crotch strap for a secure fit before travel.

Features & Components
Like exploring Barcelona’s streets, understanding the KeyFit 30’s parts – shell, headrest, inserts, and base – is essential for safe and proper infant restraint.
KeyFit 30 Carrier Shell Overview
The KeyFit 30 carrier shell is engineered for maximum infant protection and ease of use. Its robust construction provides a secure environment during travel, while thoughtfully designed features enhance functionality.

Notice the integrated carry handle, allowing for convenient portability when the carrier is detached from the base. The shell’s contours are specifically shaped to cradle your baby comfortably and securely. Examine the side impact protection, a crucial safety element designed to absorb and distribute crash forces.
Pay attention to the location of the harness straps and buckle; these are integral to proper restraint. The shell also incorporates attachment points for the LATCH connectors and seat belt path, ensuring a stable installation. Familiarize yourself with the release buttons, which allow for easy detachment from the base. Understanding these features is the first step towards ensuring your child’s safety and comfort.
Adjustable Headrest and Harness
The KeyFit 30 features an easily adjustable headrest and five-point harness system, crucial for a secure and comfortable fit as your baby grows. The headrest boasts multiple positions, allowing you to customize the height to accommodate your infant’s developing stature.
To adjust the headrest, locate the adjustment strap at the back of the carrier shell and pull or release it to achieve the desired height. Simultaneously, the harness straps adjust in conjunction with the headrest, ensuring proper shoulder positioning. Regularly check that the harness straps are at or below your baby’s shoulders.
The harness buckle is designed for intuitive operation. Ensure the straps are free of twists before securing the buckle. A proper fit is snug, allowing no more than one finger’s width of space between the harness and your baby’s collarbone. Consistent adjustment is vital for optimal safety and comfort throughout your child’s first year.
Removable Infant Insert
The Chicco KeyFit 30 includes a thoughtfully designed removable infant insert, providing essential support and positioning for newborns and smaller babies. This insert cradles your little one, ensuring a secure and comfortable ride, particularly during those early months when head and neck control are still developing.
The insert is specifically contoured to offer optimal head and body support, promoting a proper recline angle crucial for infant safety. As your baby grows and gains strength, the insert can be removed to create more space within the carrier. Refer to the weight and height guidelines in this manual to determine when removal is appropriate.
To remove the insert, simply detach it from the carrier shell following the instructions detailed in the diagrams. Ensure the carrier is properly adjusted after removing the insert to maintain a secure fit for your growing child. Regular checks are vital for continued safety.
Base Components and Adjustments
The Chicco KeyFit 30 base features several key components designed for a secure and adjustable installation. These include the LATCH connectors, which provide a rigid connection to your vehicle, and the belt path for seat belt installation, offering flexibility based on your car’s configuration. The base also incorporates a leveling indicator, crucial for achieving the correct recline angle for infant safety.
Adjustments are straightforward: the LATCH straps can be tightened or loosened to ensure a snug fit, while the recline angle is adjusted via a simple mechanism located beneath the base. Always verify the leveling indicator confirms proper installation. Understanding these components and their adjustments is paramount for safe travel.
Regularly inspect the base for any signs of damage or wear. Proper maintenance and adjustment are vital for the continued safety and functionality of the KeyFit 30 system.

Safety & Maintenance
Barcelona addresses highlight location, but the KeyFit 30 demands diligent upkeep: regular checks, cleaning, and awareness of expiration dates ensure continued safety.

Re-Threading the Harness
Occasionally, the KeyFit 30 harness straps may require re-threading, particularly after extensive use or if adjustments become difficult. This process ensures optimal safety and a secure fit for your growing infant. Begin by completely loosening both shoulder straps and the crotch strap. Locate the harness slots on the carrier shell – these are the openings where the straps feed through.
Carefully detach the harness straps from the slots. It’s often easiest to start with the shoulder straps. Once detached, inspect the straps for any signs of wear or damage. If damage is present, discontinue use and contact Chicco customer support. To re-thread, insert the strap ends back into the corresponding slots, ensuring they click securely into place.
Double-check that the straps are not twisted and that they move freely through the slots. Repeat this process for all harness components. Finally, test the adjustment mechanism to confirm smooth operation. Remember, proper harness threading is crucial for your child’s safety during every journey. Refer to the detailed diagrams in the full instruction manual for visual guidance.
Cleaning and Care Instructions
Maintaining a clean KeyFit 30 is essential for hygiene and longevity. Regular cleaning helps prevent the buildup of dirt and germs, ensuring a safe and comfortable environment for your baby. The carrier shell can be wiped down with a mild soap and warm water solution. Avoid harsh chemicals or abrasive cleaners, as these can damage the plastic.
Fabric covers and infant inserts are removable and machine washable. Use a gentle cycle with cold water and mild detergent. Air dry only; do not tumble dry, as heat can cause shrinkage or damage. The base should be cleaned with a damp cloth, avoiding direct contact with the LATCH connectors or belt-path.
Inspect all components regularly for wear and tear. Do not use bleach or strong disinfectants. Ensure all parts are completely dry before reassembling the car seat. Proper cleaning and care will help extend the life of your KeyFit 30 and maintain its safety features.
Expiration Date and Replacement

Car seats, including the Chicco KeyFit 30, have an expiration date, typically six to ten years from the date of manufacture. This is due to plastic degradation and potential wear and tear on safety components over time. Locate the expiration date sticker, usually found on the base or carrier shell.
Even without an accident, the materials can become brittle and less effective in a crash. Discontinue use after the expiration date and replace the car seat. A car seat involved in a moderate to severe crash must be replaced immediately, even if there’s no visible damage.
Regularly inspect your KeyFit 30 for any signs of damage, such as cracks or broken parts. If you’re unsure about the car seat’s condition or expiration date, contact Chicco customer support for guidance. Prioritizing replacement ensures continued safety for your child.
Checking for Recalls
Staying informed about potential recalls is crucial for your child’s safety. Chicco proactively addresses any safety concerns with their KeyFit 30 car seat. Regularly check the National Highway Traffic Safety Administration (NHTSA) website (nhtsa.gov/recalls) using your car seat’s model number and manufacture date.
You can also sign up for email alerts from NHTSA to receive notifications about recalls directly. Additionally, visit the Chicco website (chicco.com) and navigate to the “Safety & Recalls” section for the most up-to-date information.
If a recall is identified for your KeyFit 30, follow the instructions provided by Chicco immediately. This may involve scheduling a free repair or receiving a replacement part. Don’t hesitate to contact Chicco customer support if you have any questions or concerns regarding a recall notice.

Troubleshooting
Barcelona addresses and property details are irrelevant here; instead, this section provides solutions for common KeyFit 30 issues, ensuring a secure installation and usage.
Difficulty Installing the Base
If you’re experiencing trouble securing the KeyFit 30 base, double-check the LATCH connectors or seat belt path. Ensure the connectors are firmly attached to the anchor points, and the seat belt is locked – a crucial step often overlooked. Verify the vehicle’s compatibility; not all vehicles accommodate all car seats perfectly.
Refer to both the car seat manual and your vehicle’s owner’s manual for specific instructions. Sometimes, a slightly different approach is needed based on your car’s design. If using the LATCH system, confirm the anchors aren’t obstructed. For seat belt installation, ensure the belt lies flat and isn’t twisted.
A common issue is insufficient force when tightening. Apply firm, consistent pressure. If problems persist, consider seeking assistance from a Certified Child Passenger Safety Technician (CPST) – they can provide personalized guidance and ensure a correct installation. Remember, a properly installed base is paramount for your child’s safety.
Harness Straps Not Adjusting
If the KeyFit 30 harness straps seem stuck or difficult to adjust, first inspect for any obstructions like fabric or debris caught within the mechanism. Gently try pulling the straps to loosen them, then attempt to tighten them again using the adjustment strap located near the buckle. Ensure the straps aren’t twisted, as this can impede smooth operation.
Sometimes, a firm tug is needed to initiate the adjustment process. However, avoid excessive force, which could damage the system. Check that the headrest is at the correct height for your infant; an improperly positioned headrest can affect harness functionality.
If the issue persists, re-threading the harness (refer to the ‘Re-Threading the Harness’ section) might be necessary. This ensures proper alignment and functionality. If you’re still unable to adjust the straps, contact Chicco customer support for assistance – do not use the car seat if the harness cannot be properly secured.
Base Not Level
A properly leveled base is crucial for optimal car seat safety. If the KeyFit 30 base isn’t level, utilize the bubble level indicator located on the base itself. Adjust the recline angle using the foot located underneath the base until the bubble centers within the indicator. Remember that vehicle seat contours can sometimes make achieving a perfectly level position challenging.
If the vehicle seat is significantly sloped, consider using a rolled towel or pool noodle specifically designed for car seat installation under the base to achieve the correct angle. Do not use newspapers or other materials. Double-check the level after each adjustment.
Ensure the base is firmly secured using either the LATCH system or the seat belt, as a loose base can also contribute to an uneven installation. Re-check the level after securing the base. If leveling proves consistently difficult, consult a Certified Child Passenger Safety Technician (CPST) for assistance.
Carrier Not Clicking into Base
Difficulty attaching the KeyFit 30 carrier to the base is a common concern. First, ensure you’re using the correct base – the KeyFit 30 is designed to work exclusively with its corresponding base. Verify that the carrier handle is in the proper carrying position; it must be fully engaged for secure attachment.
Align the carrier with the base, ensuring both sides are simultaneously guided into the base receivers. You should hear a distinct “click” sound on both sides, confirming a secure connection. If only one side clicks, gently adjust and apply firm, even pressure to the other side.
Avoid forcing the carrier onto the base. Check for any obstructions within the base receivers. If the issue persists, try slightly wiggling the carrier while applying pressure. A CPST can provide hands-on guidance if you continue to experience difficulties.

Additional Resources
For further assistance with your KeyFit 30, or regarding Barcelona addresses, contact Chicco support or a certified Child Passenger Safety Technician immediately.
Chicco Customer Support Contact Information
Should you encounter any difficulties or have questions regarding your Chicco KeyFit 30 car seat, Chicco provides multiple avenues for support. Their dedicated customer service team is equipped to assist with installation, usage, and troubleshooting. You can reach them directly via phone at 1-800-848-2229, available Monday through Friday, 9 AM to 5 PM EST.
Alternatively, comprehensive support is available on the Chicco website (www.chiccousa.com) through their FAQ section, instructional videos, and live chat feature. For immediate assistance, consider utilizing the online chat option. Email support is also accessible through the website’s contact form. Remember to have your model number and date of purchase readily available when contacting support to expedite the process. Chicco prioritizes safety and is committed to providing excellent customer care.
FAA Approval for Air Travel
The Chicco KeyFit 30 car seat is approved for use on commercial airlines by the Federal Aviation Administration (FAA). This certification ensures the seat meets stringent safety standards for air travel, providing peace of mind when flying with your infant. However, it’s crucial to verify the specific airline’s policies regarding car seat usage, as requirements can vary.
Generally, the KeyFit 30 can be used in a standard airplane seat, secured with the aircraft’s seatbelt. Always ensure the car seat is installed correctly and tightly, following both the KeyFit 30 instruction manual and any airline-specific guidelines. Due to aircraft seat dimensions, it’s advisable to confirm compatibility with your chosen airline beforehand. Properly securing your child in a certified car seat significantly enhances safety during turbulence or unexpected events.